Raptosaur – my new large format 3-D printer

I’ve been finishing my new 3-D printer.


A view Inside the enormous print area.
Here is a link to a video of one of it’s first prints: Raptosaur.
I was printing a leopard seal skull from digimorph.org at 30% scale, at the Mini Makerfaire at Vocademy in Riverside CA. When it’s calibrated I will be able to print this full scale. I want to provide full size fossil and animal skulls to local schools.
The features of this printer:
- Large printing area: 14″ diameter (or as wide as 17″) by 24″ tall
- Temperature controlled build chamber to allow building big without shrinkage problems
- Double pane Lexan window
- Magnetic ball joints for low friction no-lash movement
- Carbon fiber rods
- High temperature neodymium magnets in the carbon fiber rods attach them to the ball joints
- Heated build plate made from cast aluminum tooling plate
- High resolution (400 step), high torque Nema 23 stepper motors
- Custom direct-drive Bowden Extruder (using the same model stepper)
- Custom Hot-End using coaxial cooling (details in another post)
- The case is built using 3/4″ MDO plywood
- A Rumba controller (for now)
In the video I had just gotten the printer working, with a few bugs to iron out. Since then I have:
- Adjusted the accelerations to fix problems with missing steps.
- Ground flats on the stepper motor shafts to keep the pulleys from slipping
- Printed stronger parts for the extruder tension leaver
- Printed a new effector assembly and bearing brackets for stronger support of the ball bearings
- Upgraded to the latest Repetier firmware.
- Switched from Cura to Slic3r.
- Built new 1/2″ solid steel stepper motor mounts – these are much quieter! We built these at Vocademy.
- Built a mini Hall effect sensor for bed probing
- Built the power supply board for the heated bed
- Built the new effector assembly with better attachment for the 1/2″ bearings
- Built a control panel (version 1).
- Had an interview with a South Korean film crew, regarding entrepreneurs using maker spaces to jump start their businesses.
- Installed the new power supply, new effector, tested scripts for deploying and retracting the Z-probe.
In Process:
- I’m testing the bed leveling in Repetier. This is not going at all well at the moment, as the Repetier firmware 0.92 is hanging… That’s the last straw for the Rumba and Repetier, I’m going to upgrade immediately.
- Install lighter hose for the cooling air system (will require printing some adapters)
- Finish designing a 0.1 micron ULPA air filtration system that will catch the micro-particles that are emitted.
Still to do:
- Upgrade to a Smoothie Board – a 32-bit controller, and display. It’s on order, I can’t wait!
- Calibrations using Smoothieware
- Upper surround
- Finish getting ready to show at the 3d Printer Expo at the end of January!
Here are some pics of finished items:
-

The tiny double-sided board is the hall-effect sensor board for the bed-probe (for auto leveling). The blue boards are for the heated bed power supply.

Mini Hall Effect Sensor board
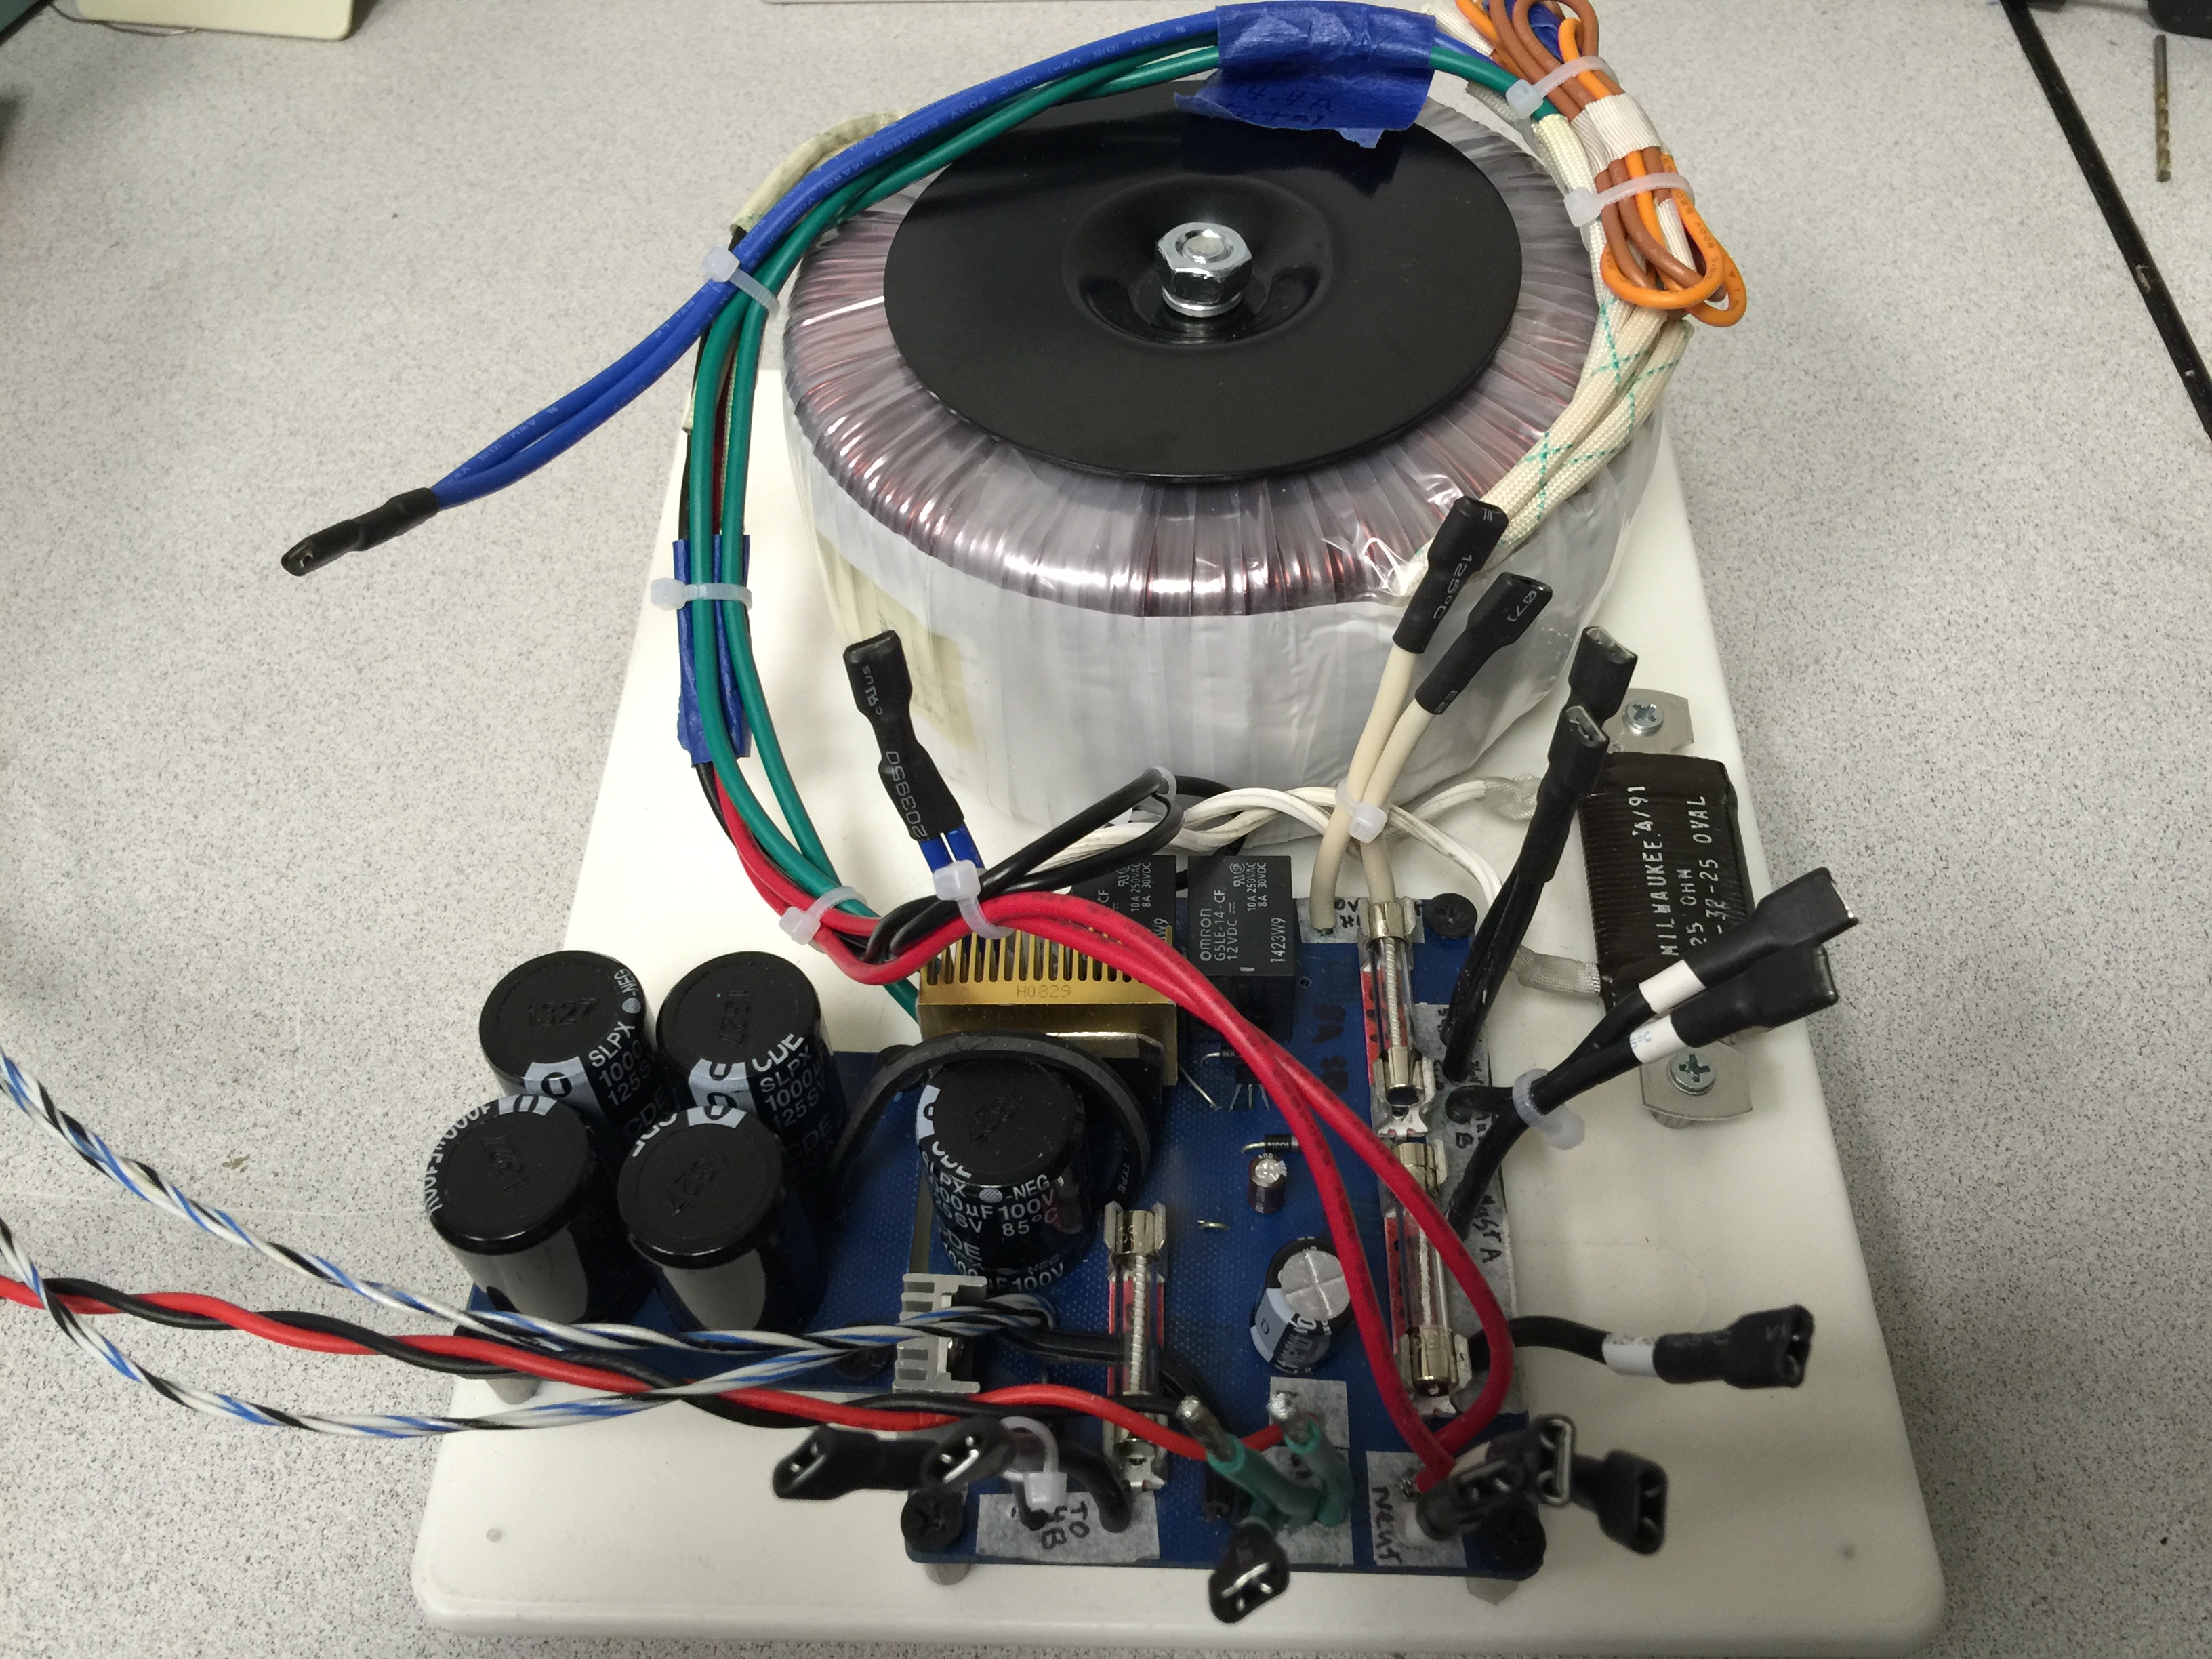
65v Heated Bed Power Supply with soft start.

Effector assembly with Z probe. Sorry about the angle!

A vase I printed for the Korean documentary film crew.

Top of the Vase
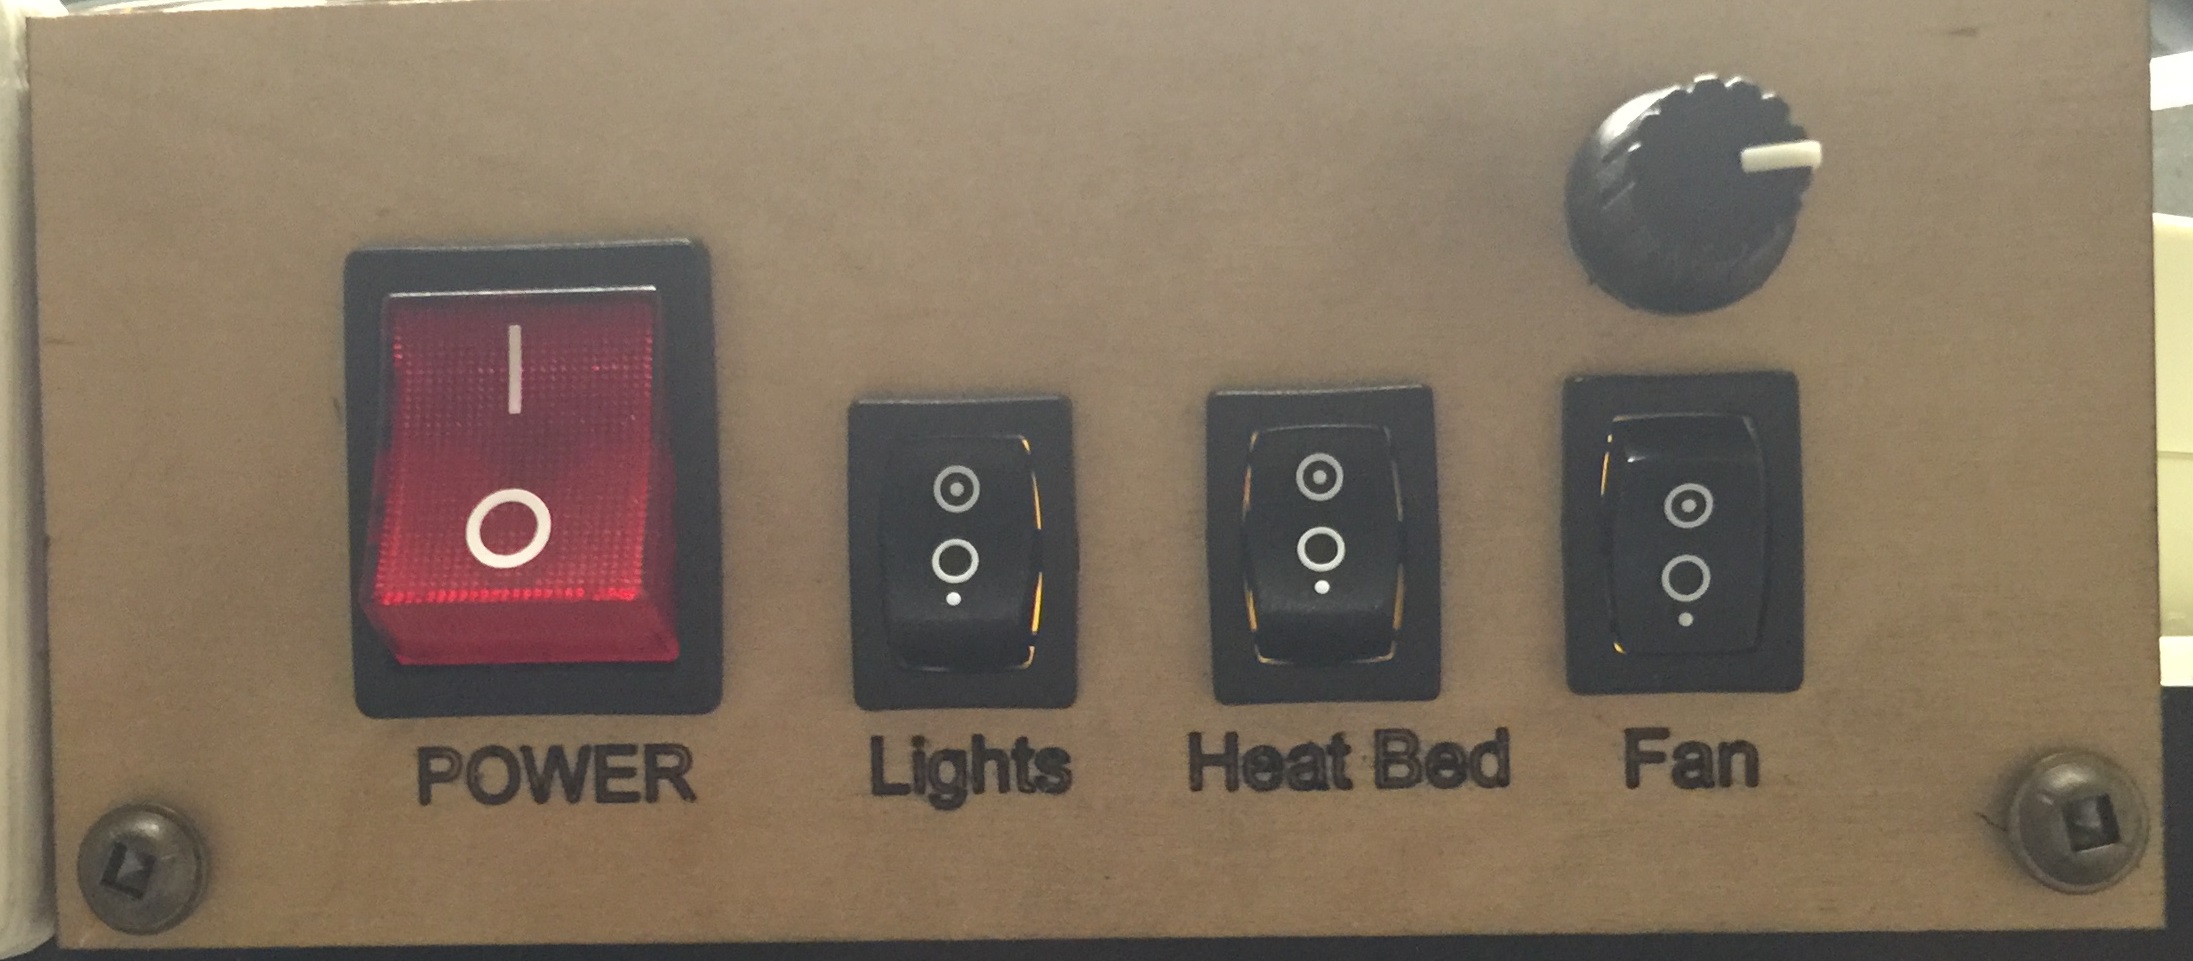
Control Panel

Looking good mate. It’s always great to see a nice bit of well thought out engineering. I have just embarked on my Delta build so have lots to do but it is coming together nicely. Love the home made ectronics also. Keep up the good work
12/06/2014 at 1:57 am